

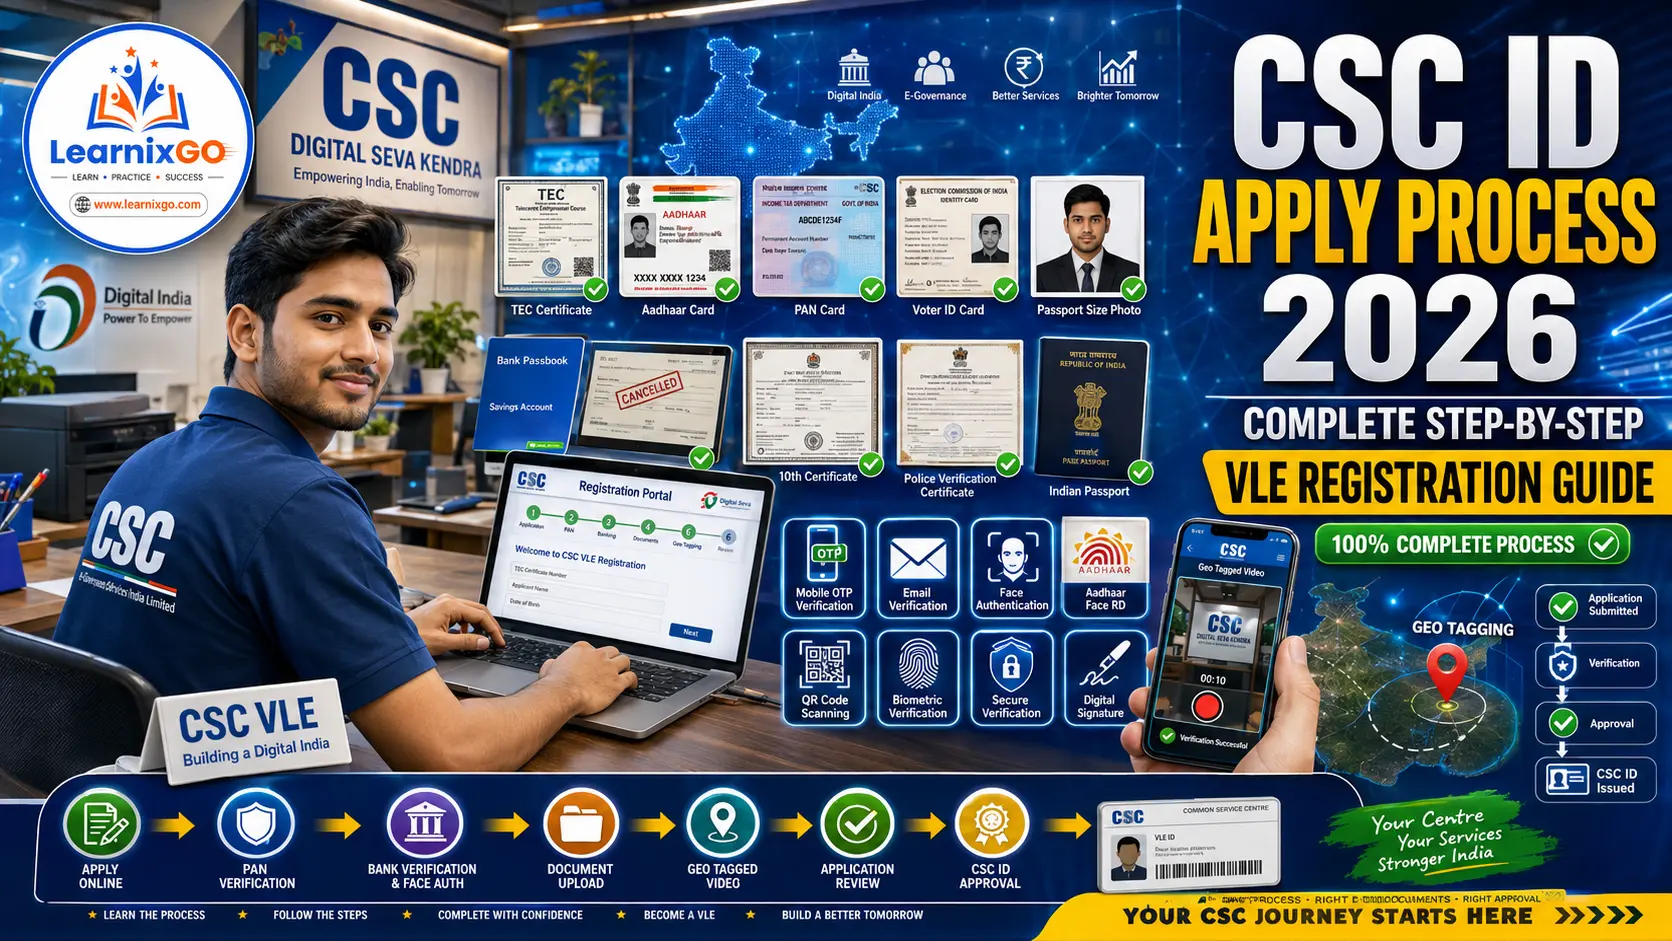
If you want to start a Common Service Centre (CSC) and become a Village Level Entrepreneur (VLE), obtaining a CSC ID is the first and most important step.
The CSC ecosystem enables entrepreneurs across India to provide hundreds of digital government and private services from a single center. Whether you want to offer Aadhaar services, banking, insurance, PAN card services, utility bill payments, government schemes, or various digital services, you must first complete the CSC VLE Registration process.
Many applicants face rejection because of incorrect documents, improper face authentication, wrong geo-tagging, or mistakes while filling the online registration form. Understanding the complete process before applying can significantly improve your chances of getting your application approved.
In this detailed guide, you’ll learn everything about the CSC ID Apply Process 2026, including:
- Eligibility criteria
- Required documents
- TEC Certificate requirement
- Mobile applications required
- Face Authentication process
- Banking verification
- Geo Tagged Video submission
- CSC ID approval timeline
- Common reasons for rejection
- Tips to get your CSC ID approved faster
Let’s begin with the requirements before starting your CSC registration.
Watch Complete Registration Process Video
What is a CSC ID?
A CSC ID (Common Service Centre ID) is a unique identification number issued to approved Village Level Entrepreneurs (VLEs) under the Common Service Centres Scheme.
After approval, the VLE receives login credentials for the Digital Seva Portal, allowing them to provide various government and digital services to citizens from their CSC center.
A CSC VLE can offer services such as:
- Aadhaar-related services
- PAN Card services
- Banking Correspondent (BC) services
- Insurance services
- Passport services
- Utility bill payments
- Government certificate services
- Pension services
- PM Kisan services
- Ayushman Bharat services
- Digital payments
- Education services
- Skill development programs
- And many more.
Eligibility Criteria for CSC ID Registration
Before applying, ensure that you meet the following eligibility requirements:
- Must be an Indian citizen.
- Must possess a valid Aadhaar Card.
- Must have a valid PAN Card.
- Must have an active mobile number linked with Aadhaar.
- Must have an active email address.
- Must possess a valid TEC Certificate.
- Should have at least a Class 10 educational qualification.
- Must have a shop or office location to operate the CSC Centre.
- Should have a computer or laptop with internet connectivity.
- Must have a biometric device for future CSC services.
Meeting these requirements before starting the registration process helps avoid unnecessary delays.
Documents Required for CSC ID Registration 2026
Before opening the CSC registration portal, keep all documents scanned and ready.
The mandatory documents include:
| Document | Required |
| Aadhaar Card | ✅ Yes |
| PAN Card | ✅ Yes |
| Voter ID Card | ✅ Yes |
| Passport Size Photograph | ✅ Yes |
| Bank Passbook / Cancelled Cheque | ✅ Yes |
| 10th Pass Certificate | ✅ Yes |
| TEC Certificate | ✅ Mandatory |
| Police Verification Certificate | ✅Mandatory |
| Passport | Optional |
| BC/BF Certificate | Optional |
Important Notes
- Every document should be original.
- Documents must be clear and readable.
- Avoid edited or cropped documents.
- Blurred documents may result in application rejection.
- Fake documents can permanently disqualify the application.
Police Verification Certificate
You must upload Police Verification Report / Police Character Certificate
If you do not have a Police Verification Certificate then contact your nearest police station before starting the registration process.
TEC Certificate is Mandatory
A TEC (Telecentre Entrepreneur Course) Certificate is mandatory for every individual applying for a CSC ID.
Without a valid TEC Certificate, the CSC registration portal will not allow you to proceed with the application.
During registration, your TEC number is validated automatically, and your basic information is fetched directly from the TEC database.
Therefore, ensure that:
- Your TEC Certificate is valid.
- Your name matches your Aadhaar and PAN Card.
- The certificate details are accurate.
For TEC Certificate Watch This Video
Prepare Your Documents Properly
Before uploading documents:
- Scan all documents in high quality.
- Save each file separately.
- Use only JPG, PNG, or PDF formats.
- Keep each file size below 1 MB.
- Store all documents in one folder for quick uploading during registration.
Proper preparation saves time and reduces the chances of uploading incorrect files.
CSC Centre Setup Before Registration
Before you start filling out the online application form, make sure your CSC Centre is ready. During the registration process, you will be required to complete Geo Tagging and upload a verification video from the exact location where you plan to operate your CSC Centre.
Your centre should have the following basic infrastructure:
- Laptop or Desktop Computer
- High-Speed Internet Connection
- Printer
- Biometric Device
- Power Backup (Inverter/UPS)
- Clean Office or Shop Space
Since the geo-tagged verification video must be recorded from your actual CSC centre, ensure that the setup is complete before applying.
Mobile Applications Required for CSC Registration
CSC registration requires three Android applications. Install them before beginning the registration process.
1. CSC Face Authentication App
This app is used to complete Aadhaar Face Authentication during registration.
2. Aadhaar Face RD App
This application works with the CSC Face Authentication App and captures your live Aadhaar face verification.
3. CSC App
After submitting the registration form, this app is used for Geo Tagged Video verification.
Installing these applications beforehand makes the registration process much smoother.
Things to Remember Before Face Authentication
For successful verification:
- Enable GPS/Location on your mobile.
- Use a stable internet connection.
- Ensure sufficient battery charge.
- Clean your mobile camera lens.
- Sit in a well-lit environment.
- Remove sunglasses, masks, or face coverings.
- Keep your face clearly visible.
Poor lighting or unstable internet may cause authentication failure.
Official CSC Registration Portal
Once everything is ready, open your preferred web browser and visit the official CSC Registration Portal.
Registration Portal Website Link – click here
The complete registration process is divided into multiple steps.
Let’s understand each step in detail.
Step 1 – CSC Application Form
The first step collects your personal information and KIOSK details.
Select Application Type
Choose:
Individual
This option is applicable for most applicants.
Enter TEC Certificate Number
Enter your valid TEC Certificate Number.
If you also have a BC/BF Certificate, enter its number.
The BC/BF Certificate is optional.
Click Validate.
After validation, the portal automatically fetches:
- Full Name
- Date of Birth
- Gender
Verify that all information is correct before proceeding.
Mobile Number Verification
Enter your active mobile number.
Click Send OTP.
Enter the OTP received on your phone.
Click Validate.
Use a mobile number that remains active because all future CSC notifications will be sent to this number.
Email Verification
Enter your email address.
Click Send OTP.
Verify the OTP.
This email ID will be used to receive:
- Application updates
- Secure Code
- Approval Status
- CSC ID
- Password
Always use an email address that you regularly access.
Fill Personal Information
Now provide your remaining personal details.
These include:
- Father’s Name
- Mother’s Name
- Marital Status
- Category
- Disability Status
- Residential Address
Fill every field carefully.
KIOSK Details
Next, provide information about your CSC Centre.
Fill the following details:
- KIOSK Name – Enter the name under which you want to operate your CSC Centre.
- KIOSK Ownership – Select whether the shop is: Owned / Rented
- KIOSK Location – Enter your complete shop address.
Remember, this must be the exact location where you will record your Geo Tagged Video.
Step 2 – PAN Authentication
The second step verifies your PAN Card.
Enter your PAN Number.
Click Validate.
Within a few seconds, the CSC portal retrieves your PAN details.
You should see:
- Applicant Name
- PAN Match Status
If your Aadhaar, PAN, and TEC details match correctly, you’ll see a successful verification message.
Tick the confirmation checkbox.
Click Next.
Your PAN Authentication is now complete.
Step 3 – Banking Details & Aadhaar Face Authentication
After completing PAN Authentication, you will be redirected to the Banking Details page.
This is one of the most important stages of the CSC registration process because your bank account and Aadhaar identity will be verified.
Enter IFSC Code
First, enter your bank’s IFSC Code.
Click Validate.
The CSC portal will automatically fetch your:
- Bank Name
- Branch Name
Verify the details before moving ahead.
Select Account Type
Now choose your account type.
- Savings Account
- Current Account
Most applicants should select Savings Account.
Enter Bank Account Number
Enter your bank account number carefully.
Double-check the account number before proceeding.
Click Validate.
Penny Drop Verification
After validating your account number, the CSC portal performs a Penny Drop Verification.
This verification confirms that:
- The bank account exists.
- The account belongs to the applicant.
- The account holder’s name matches the registration details.
If everything matches successfully, your banking verification is completed.
Nominee Details
Now provide your nominee information.
Fill in:
- Nominee Name
- Relationship with Nominee
- Date of Birth
Make sure these details match your bank records.
Aadhaar Number
Many applicants make a mistake here.
You must enter your own Aadhaar Number, not the nominee’s Aadhaar Number.
After entering your Aadhaar number, the portal displays a QR Code for Face Authentication.
CSC Face Authentication Process
Open the CSC Face Authentication App on your Android phone.
Follow these steps:
- Select General.
- Enter your TEC Certificate Number.
- Complete the CAPTCHA.
- Click Proceed.
- Tap Scan QR Code.
- Scan the QR Code displayed on your computer screen.
Once the QR code is scanned successfully, your details will appear in the app.
Now tap:
Go for Face Authentication
Install Aadhaar Face RD App
If Aadhaar Face RD is not already installed, the app redirects you to the Google Play Store.
Install the application.
Return to the CSC Face Authentication App.
Tap Start Face Capture.
Allow all requested permissions.
Tips for Successful Face Authentication
To avoid authentication failure:
- Sit in a bright environment.
- Remove sunglasses or masks.
- Keep your face inside the circle.
- Hold the phone steadily.
- Blink naturally when instructed.
- Do not move your face quickly.
After successful verification, you’ll receive a confirmation message.
Your Aadhaar Face Authentication is now complete.
Step 4 – Upload Documents
After Face Authentication, the portal automatically opens the Document Upload page.
Now upload all the required documents one by one.
Documents to Upload
Upload:
- Aadhaar Card
- PAN Card
- Passport Size Photograph
- Bank Passbook or Cancelled Cheque
- Voter ID Card
- Highest Educational Certificate
- TEC Certificate
- Passport or Police Verification Certificate
If you have optional documents, you may upload them as well.
Check Document Preview
After uploading each document, it appears in the preview section.
Open every file once and verify that:
- The correct document is uploaded.
- The document is readable.
- Nothing is blurred.
- All corners are visible.
If you uploaded the wrong file, delete it and upload the correct one before final submission.
Final Submission
After uploading all documents:
- Read the declaration.
- Accept the Terms & Conditions.
- Click Next.
Your application will now be submitted successfully.
You will receive an Application Reference Number.
Save it carefully.
Download or print the acknowledgement for future reference.
Secure Code Email
After successful application submission, CSC sends an email to your registered email address.
This email contains:
- Application Reference Number
- 6-Digit Secure Code
Both of these are required for the Geo Tagging process.
Do not delete this email.
Step 5 – Geo Tagged Video Submission
The registration process is not complete until you upload a Geo Tagged Video.
Download and open the CSC App on your Android phone.
Sign up and allow all requested permissions, including:
- Camera
- Microphone
- Location
Enter Registration Details
Inside the CSC App, enter:
- Application Reference Number
- Secure Code
- Registered Mobile Number
Click Proceed to Capture Video.
Geo Tagged Video Guidelines
The verification video must follow these instructions:
Video Duration
Approximately 10 seconds.
Location
Record the video only from the actual CSC Centre location mentioned during registration.
Background
The background should clearly show:
- CSC Centre Setup
- CSC Banner
- Computer
- Printer
- Workspace
Applicant
The applicant must stand in front of the centre.
A4 Sheet
Hold an A4 sheet displaying:
- PAN Number
- Application Reference Number
Both numbers should be clearly visible.
Voice Verification
While recording, clearly speak:
“My name is ________ and my Date of Birth is ________.”
You may speak in English or Hindi.
Submit Geo Tagged Video
After recording:
- Review the video.
- Retake if necessary.
- Accept the declaration.
- Click Submit.
Once uploaded successfully, your CSC registration process is complete.
Application Verification Process
After submission, your application enters manual verification.
Initially, you receive an email stating:
Application Approval Awaited
This means CSC officials are reviewing:
- Personal Details
- Documents
- Face Authentication
- Geo Tagged Video
- Centre Verification
CSC ID Approval Time
Approval time depends on document verification.
Generally:
- Minimum: 48 Hours
- Normal: 5–7 Days
- Maximum: Up to 30 Days (in some cases)
Applicants should regularly check their registered email and mobile number for updates.
CSC ID Approval Email
Once approved, you’ll receive another email.
This email contains:
- CSC ID
- Temporary Password
You can now log in to the Digital Seva Portal and start offering CSC services.
Common Reasons for CSC Application Rejection
Most applications are rejected due to avoidable mistakes.
Common reasons include:
- Blurred documents
- Edited or fake documents
- Incorrect Aadhaar details
- PAN details mismatch
- Bank account mismatch
- Failed Face Authentication
- Poor Geo Tagged Video
- Wrong registration information
- Incorrect KIOSK address
- Video recorded at the wrong location
Always review every detail carefully before final submission.
Expert Tips for Faster CSC ID Approval
To improve your chances of approval:
- Use only original documents.
- Ensure Aadhaar, PAN, and bank details match exactly.
- Keep your mobile number active.
- Regularly check your email.
- Record the Geo Tagged Video at your actual CSC Centre.
- Use proper lighting during Face Authentication.
- Keep all uploaded files clear and readable.
- Verify every document before submission.
- Save your Application Reference Number securely.
Following these best practices can help reduce delays and improve approval chances.
Frequently Asked Questions (FAQs)
Is the TEC Certificate mandatory for CSC ID registration?
Yes. A valid TEC Certificate is mandatory for all new CSC VLE registrations.
Can I apply without a Passport?
Yes. If you do not have an Indian Passport, you can upload a Police Verification Certificate or Police Character Certificate.
Is the BC/BF Certificate compulsory?
No. The BC/BF Certificate is optional.
How long does CSC ID approval take?
Approval may take anywhere between 48 hours and 30 days, depending on verification.
Can I edit my application after submission?
No. Once submitted, the application cannot be edited. Carefully verify all information before final submission.
What should I do if my application is rejected?
Check the rejection reason mentioned in your registered email. Correct the issue and submit a fresh application with accurate details.
All Important Links
| CSC ID Registration Website | https://cscregister.csccloud.in |
| TEC Exam Registration Website | https://cscentrepreneur.in |
| CSC Face Authentication App | Download App |
| Aadhar Face RD App | Download App |
| CSC App for Geotag Video | Download App |
| TEC Exam Preparation Study Materials | Download |
Conclusion
Applying for a CSC ID in 2026 is a straightforward process when you understand each step and prepare your documents in advance. From obtaining a valid TEC Certificate to completing Face Authentication, uploading clear documents, and submitting a proper Geo Tagged Video, every stage plays an important role in the approval process.
Take your time while filling out the application, verify every detail carefully, and follow the official instructions closely. Avoid common mistakes such as document mismatches, poor-quality uploads, or incorrect verification details.
Once your application is approved, you will receive your CSC ID and temporary password via your registered email, allowing you to access the Digital Seva Portal and begin offering a wide range of government and digital services as a Village Level Entrepreneur (VLE).
By following this complete guide, you can confidently complete the CSC ID Apply Process 2026 and significantly improve your chances of getting your registration approved successfully.